My Simple Wildflowers
Any ideas or images in these pages have been used entirely without profit or gain,
and therefore are free from any copywrite infringement.
This tutorial was written for the girls in my CloserWalkSister's group to increase their understanding of PSP,
and if it resembles any other tutorials that exist on the internet or anywhere else, that is purely coincidental.
I've had several questions on how to do this technique......
So I quickly wrote up this mini-tutorial.
Have fun, gals. :)
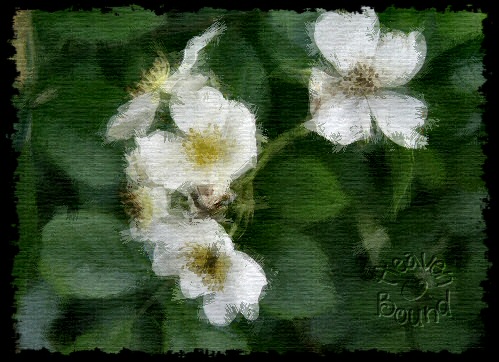
You begin with an image that you like......and
probably for this particular technique a floral would be the best.....
Here is how I did this one.....
This was all done in PSP 8.
Open your graphic, and copy it.
then resize the copy to around 500 px
Close the original.
On the copy, right click on your layer palette, and duplicate the background.
Go to effects/art media effects/colored pencil
Set it at detail 85, opacity 30.
Go back down to your background (bottom) layer on the layer palette
and duplicate it again and pull
this layer to the top.
On this layer, go to adjust/add remove noise/ salt and pepper filter.
I have it set at 19 speck size and 5 sensitivity.
Aggressive action is checked the other one is not.
Adjust BOTH top layers to the slide opacity bar of the layer palette
to what looks best to you.
I think the top layer should be a lower number than the next one.
Merge all.
Then apply a texture that you like and you will have the basic image.
You can frame it or do whatever you want with it.
* * * *
Click Here To Go Back To My PSP Tutorials Page