Layered Wallpaper
Any ideas or images in these pages have been used entirely without profit or gain,
and therefore are free from any copywrite infringement.
This tutorial was written for the girls in my CloserWalkSister's group to increase their understanding of PSP,
and if it resembles any other tutorials that exist on the internet or anywhere else, that is purely coincidental.
* * *
I do not know who are the creators of the images I am using, so I cannot give proper credit to them.
***
I have been asked to write a tutorial on how to do this effect for a wallpaper.
Here is my attempt at it.
* * *
1. Open the image of your choice in PSP. Duplicate it and close the original.
2. Resize your image to 1600 x 1200 pixels. Not all images will work for wallpapers. If your image is distorted and if you cannot crop to make it look right, you will have to choose another image.
3. After you have resized your image to 1600 x 1200, apply an inner bevel with the following settings
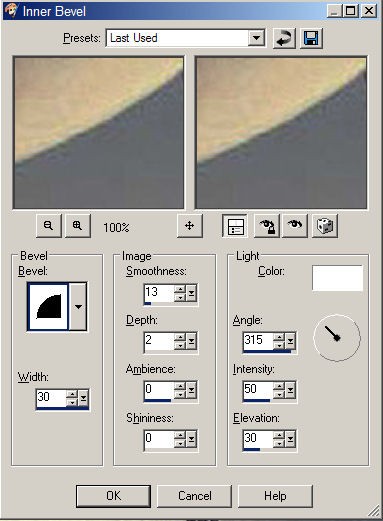
This will take awhile for PSP to do, because the image is so large. We are doing it now so we
only have to do it once.
To save your inner bevel settings for future use, click on the save icon.
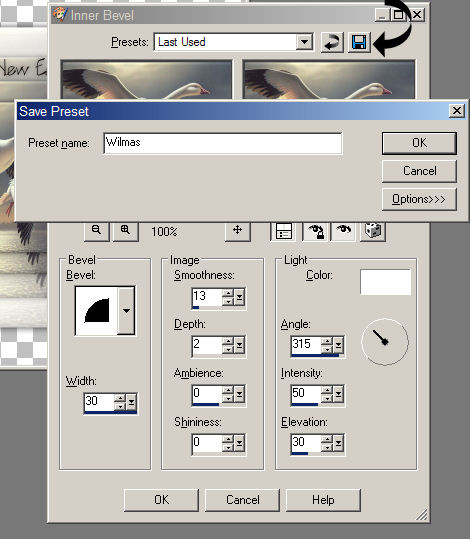
Name it and click ok.
In future you can click on the drop down menu and find your settings.
I find this saves me a lot of time.
4. Duplicate your image 3 times.
Resize the first of the duplicated images to 1280 x 960.
Copy and paste it onto the 1600 image.
5. Resize the next duplicated image to 1024 x 768
and copy and paste it onto the 1600 image.
6. Resize the third duplicated image to 800 x 600 and
copy and paste it onto the 1600 image.
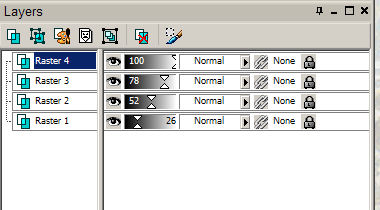
7. You should now have 4 layers on your layer pallete.
Click on layer 2 and apply the following drop shadow:
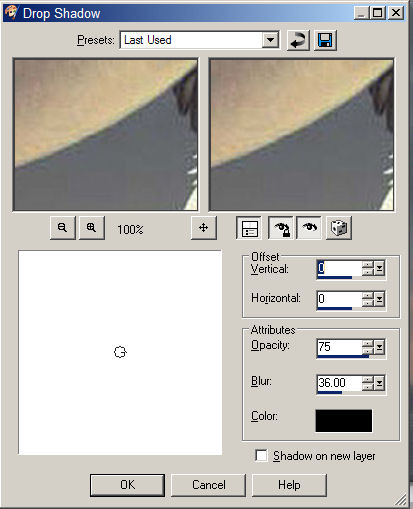
To save your drop shadow settings for future use, click on the save icon
and name it and click ok.
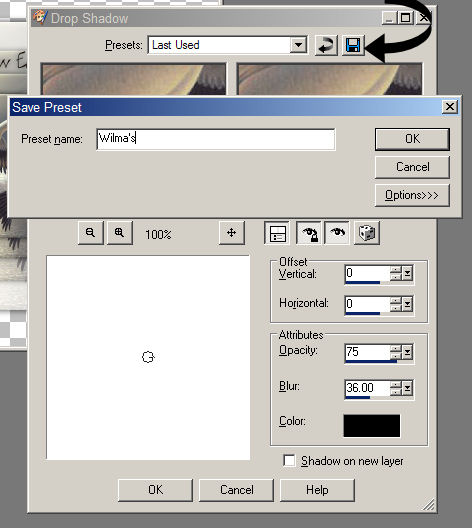
Now you have these settings saved and are ready for future projects.
8. Now Apply this drop shadow to layers 3 and 4.
Sometimes, I will repeat the drop shadows in order to get them to show up better.
It just depends on your image. A darker image needs more drop shadow.
9. Now go back to your layer pallette and click on layer 1 and lower the opacity to 26.
Lower the opacity of layer 2 to 52
Lower the opacity of layer 3 to 78
and leave layer 4 at opacity of 100.
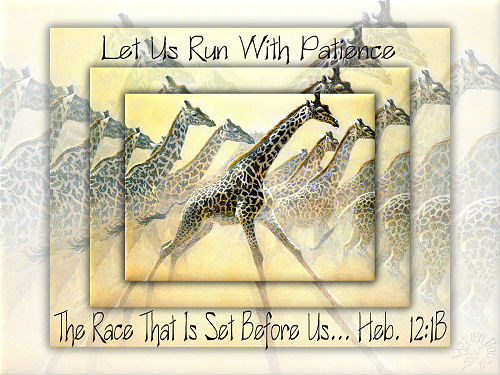
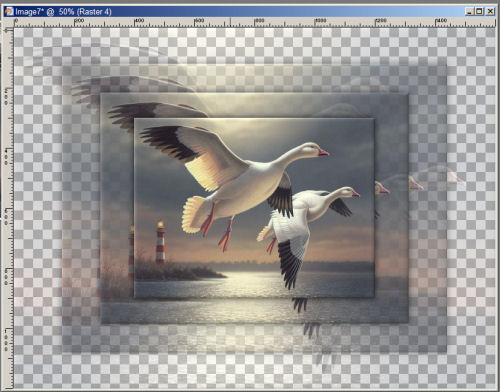
This is what your image should look like.
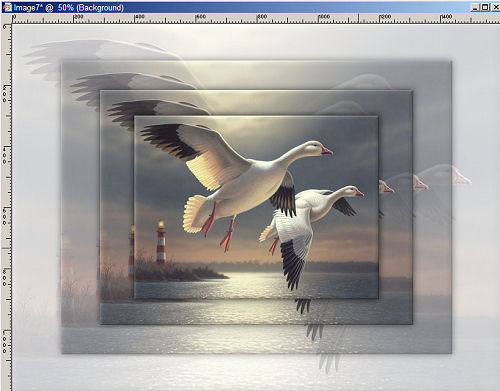
10. Go to Selections/merge all flatten
This is what your image will now look like:
11. Now you can add your water mark and text as desired,
merge all flatten, and save.
To make different sizes, duplicate from your 1600 image and resize
as you want. This means you will have to duplicate your 1600 image
3 or 4 times to get the different sizes.
I make 1280, 1152, 1024, and 800 in addition to the 1600.
You will probably have to sharpen each one, but sometimes I don't have to.
It just depends on the image.
That's all Folks!!!
Click Here To Go Back To My PSP Tutorials Page