
Here is how I make a simple topper ......
Any ideas or images in these pages have been used entirely without profit or gain,
and therefore are free from any copywrite infringement.
This tutorial was written for the girls in my CloserWalkSister's group to increase their understanding of PSP,
and if it resembles any other tutorials that exist on the internet or anywhere else, that is purely coincidental.
* * *
I do not know who is the creator of the image I am using, so I cannot give credit to them.
***
Go here for the mask you will need in this tutorial.
It is a jpeg. R.click on it and save it somewhere on your harddrive where you will be able to find it again.
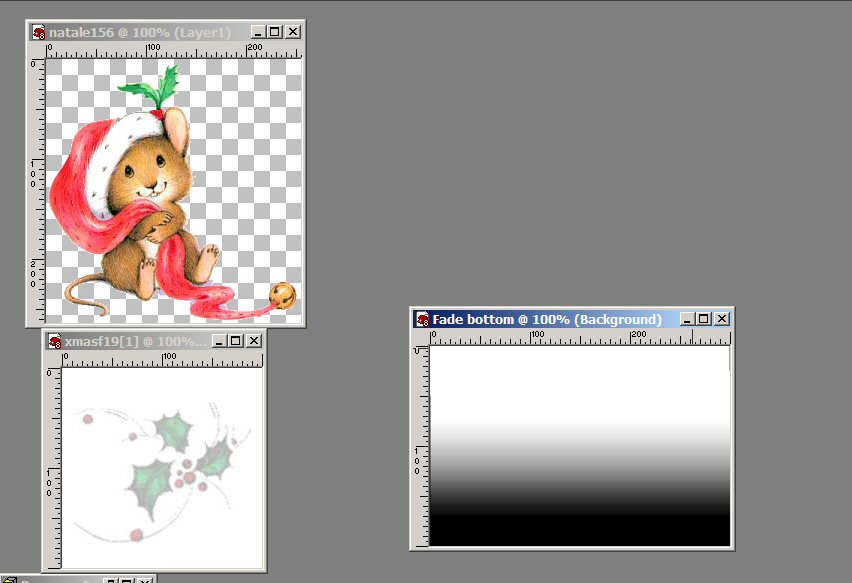
Open a tube of your choice, your background image, and the mask in psp.
This is how my screen looks when I have everything open:
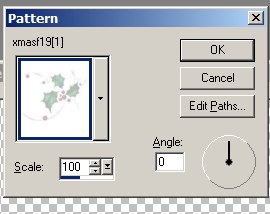
Go to file/new and open a new blank image 1280 x 350 transparent (we want to make it wide enough to fit most screens, and tall enough to accomodate our tube).
Go to pattern and select your background image, and then fill your blank with this image........
Go to layers/merge all (flatten)
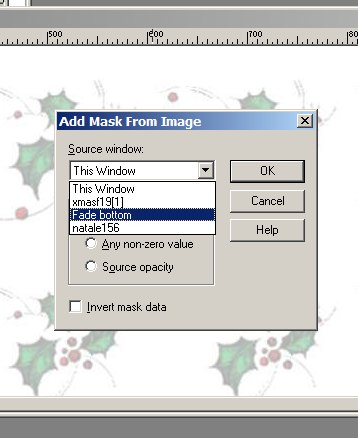
Go to masks/ new/from image and choose the fade bottom psp image.
(If you are using PSP 8 or 9, you will need to go to layers/new mask layer/from image)
Go to masks/delete/ and click on yes when prompted.
(In PSP 9, you will go to layers/delete)
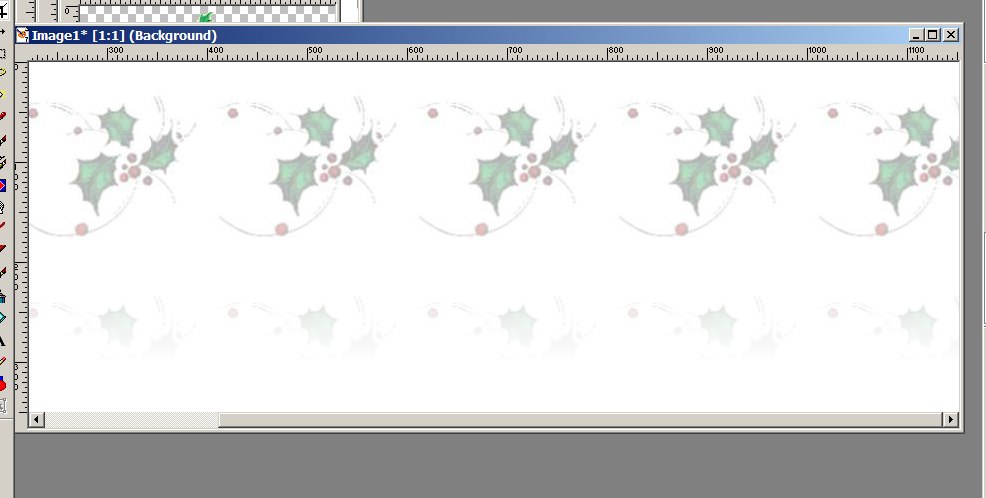
Go to layers/ merge/merge all (flatten)
Your blank should now look like this:
Select your tube. Click shift and d at the same time to duplicate the tube close the original.
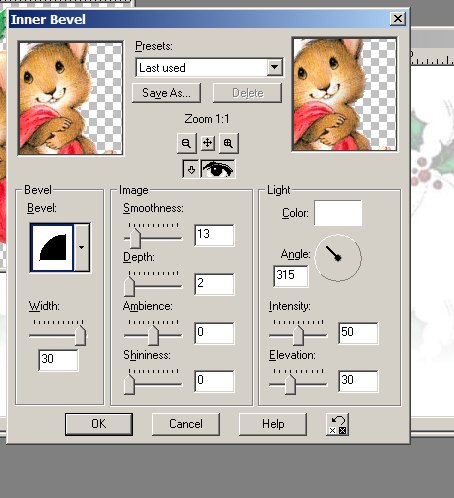
Go to effects/3d effects/inner bevel and use the following settings:
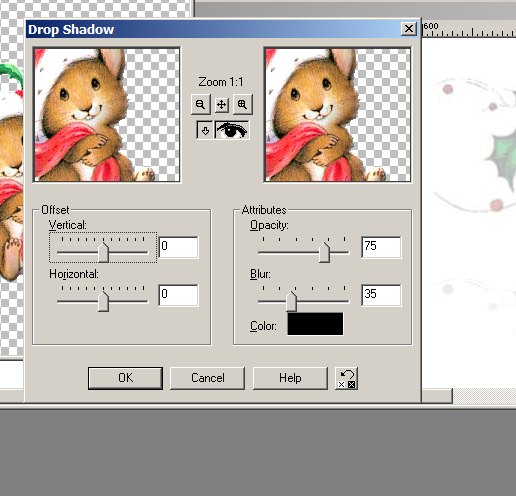
Go to effects/drop shadow/ and use the following settings:
Edit/copy this image and then edit/paste as a new layer
onto the 1280 background image, and position it where you want it to be.
I have mine way to the left of the background image.
Go to layers/merge/merge all (flatten)
Add your watermark now if you desire one. If you need a tutorial on doing
a watermark, I have one at my site.
New Layer
Type in your text,
making sure everything stays within the 800 px mark,
so that it will fit almost all screen sizes.
In this way, someone who uses a larger screen setting than 800 will not have a blank white area around the topper......
and someone who uses an 800 setting will still be able to see the entire image and text. :)
Go to effects/3d effects/inner bevel....and use the same settings that you used before.
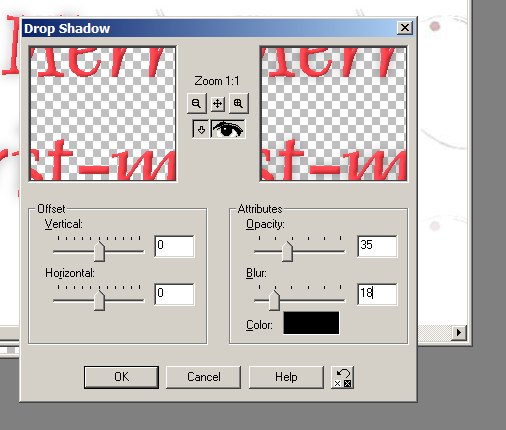
Go to effects/3d effects/drop shadow and use these settings:
They are different than the setting you used before.
Go to effects/ sharpen.
(In PSP 9 go to adjust/sharpen)
Selections/select none
Layers/merge/merge all (Flatten)
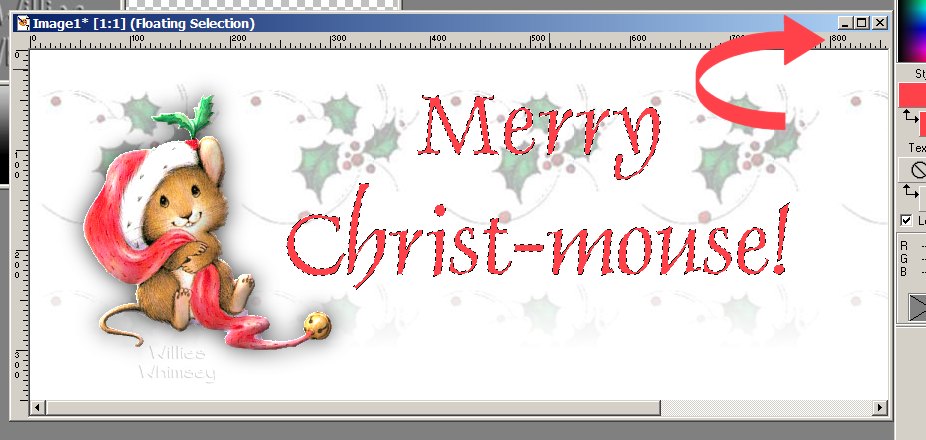
Your topper should look like this:
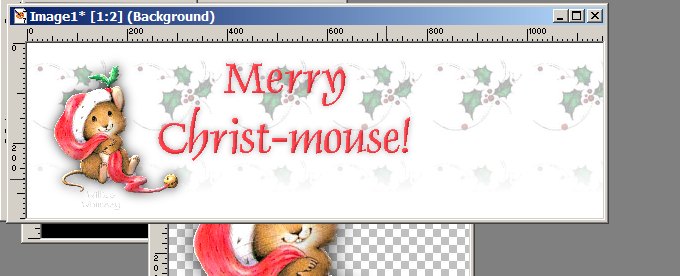
Your topper is complete.......... so now you can save it.
Now, if you want to make a matching tag, go back to your original image that you copied and pasted onto the topper.
Copy and paste it onto a blank white image.
(I like to keep my tags around 300 px)
Position and size the tube the way you want it to be.
You do not need to apply the inner bevel, because that was already been done on the original image that you used for the topper.
Go to Layers/merge/merge all (flatten)
Add your watermark if you desire....... and merge all
New raster layer
Add your text
Repeat the inner bevel, same settings as before.
Add a drop shadow, same as the last one you did.
Selections/ select none
Layers/merge/merge all (flatten)
Crop or resize if necessary and save.
All done!!! :)
Here is my tag.

Click Here To Go Back To My PSP Tutorials Page